The Banded Ankle Mobilization
Banded ankle mobility mobilizations are simple and effective drills you can use to improve ankle range of motion.
Most of us could use more ankle mobility, especially those of us who sit most of the day and then try to train functional exercises like the squat.
Because the ankle links our feet to the rest of our bodies its function is critical in any weight-bearing movement.
So what do you do if you’ve stretched and foam rolled your calves forever but haven’t seen dramatic ankle range of motion improvements?
If that’s the case then your restriction could be coming from the ankle joint itself and not the calf muscles.
The banded ankle mobilization works best for ligaments, not muscles
Ankle Muscles
Ankle dorsiflexion can be limited by a few things. The most common being the muscles that cross the ankle and the ligaments that stabilize the ankle joint.
The muscles that restrict ankle dorsiflexion come in a couple of groups. The primary plantar flexors include the superficial calf muscles, the gastrocnemius, and soleus. The secondary plantar flexors are the deep calf muscles- the long flexors of the toes and the posterior tibialis as well as the peroneals.
Collectively these muscles work together to push the ball of your foot down towards the floor, like a gas pedal. However, the secondary plantar flexors also have more subtle roles in the foot and ankle like flexing the toes, and ankle pronation and supination.
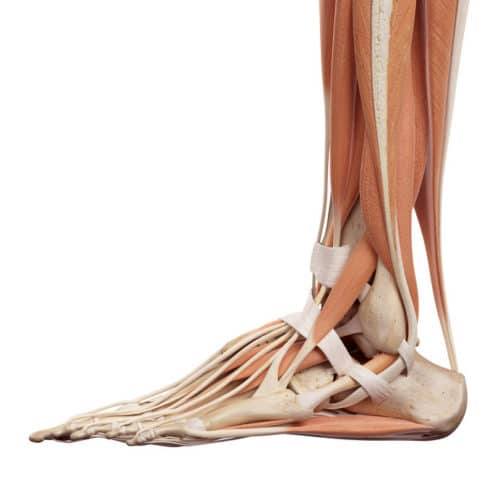
The muscles of the ankle that restrict dorsiflexion include the main plantar flexors – the gastrocnemius, soleus, and plantaris. The peroneals, deep toe flexors, and posterior tibialis can also restrict dorsiflexion. Foam rolling these muscles can also help to improve ankle mobility.
Ankle Ligaments
The ligaments of the ankle surround the joint and provide support for the joint along with the muscles.
Anyone who has sprained their ankle has a higher likelihood of these ligaments becoming tight and dysfunctional.
The banded ankle mobilization is intended to help release the ligaments of the ankle while not affecting the muscles much at all.
The banded ankle mobilization drill works well if you have foam rolled and stretched your calves for a long time with minimal or no improvements in ankle range of motion. It is also recommended if you feel a pinching sensation in the front of your ankle when stretching your calf or descending into a squat or similar position.
It works by anchoring your talus (ankle bone) and pulling it backward, allowing the shin bone (tibia) to slide over the top of the talus.
That pinching that I mentioned before happens when the bones don’t slide well enough and compress at the front of the joint. We call this anterior impingement and it can also be due to bony growth in that area, but that is a completely different article altogether.
If you aren’t sure if you need an ankle range of motion then try the ankle dorsiflexion assessment in the video below.
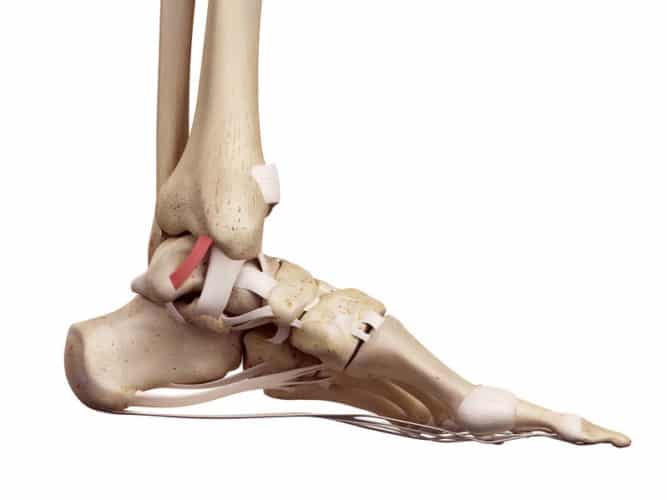
The posterior ankle ligaments usually get short and tight as a result of injury or general immobility. If you have a desk job and don’t spend time working into end range ankle movements then there’s a good chance these are tight. These ligaments are the target tissues of the banded ankle mobilization.
Ankle Mobility Assessment
Ankle Range of motion is key for athletic performance and staying injury-free. If you pass the assessment then you can be relatively certain that your ankles don’t need much mobility.
If, like most of us, you don’t pass the assessment then using the banded ankle mobilization below may help you gain some extra range of motion.
Banded Ankle Mobilization Set Up
Band placement
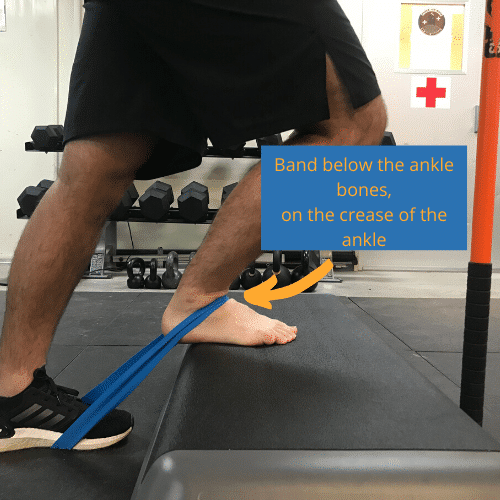
The most important thing about this banded ankle mobility drill is the placement of the band. All too often I see people place the band too high on their ankle. But with the band so high it actually has the opposite effect of what we are trying to accomplish.
The goal of this drill is to pull the talus down and back while the tibia glides over the top of it, not to pull the tibia backwards.
The correct position is just below the crease of the ankle. This will help lock the talus in place and allow the tibia to slide over the top.
Step or box
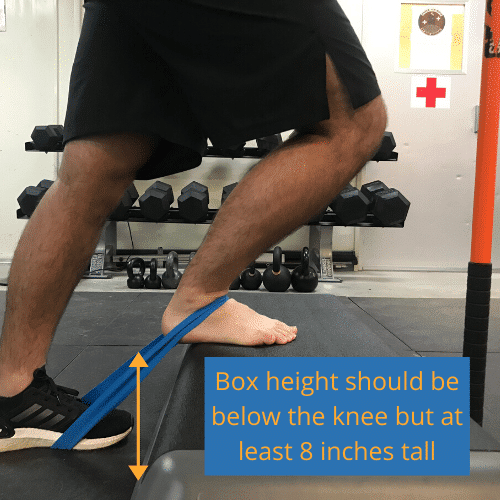
Set up a stack of plates, plyo-box, or jerk block to about one foot off the ground. If you can’t get it perfect that’s ok. The important take away is to keep it below knee height but at or above 8 inches tall.
Remember your goal is to get the band to pull into the crease of the ankle and therefore pull on the talus. The direction should be down and back. If it is too vertical or too parallel then the drill won’t work as intended.
Performing the banded ankle mobility drill
Once you’ve set yourself up the rest is easy.
Apply tension with the band and bend your knee. Make sure to keep it in line with your foot and not let it rock inwards.
You can do this drill at any time but the way in which you do it should vary depending on when you do it.
Before Training
If you are performing the banded ankle mobility drill right before a training session then I recommend performing one set of 10 – 20 reps, holding for a 5-second count at the end range.
Holding stretches for a prolonged period of time has been shown to reduce the ability of the muscles involved to produce power.
While it is likely that performing dynamic movements after stretching but before the power session can reduce this negative effect we still recommend these shorter interval reps just to be safe.
After training or Any other time
If you don’t intend to train immediately after performing the banded ankle mobilization then you can hold for longer periods of time.
The set up is the same but in this case, we recommend that you perform 5 – 10 reps holding for at least 30 seconds.
You can play with the numbers but in general, the total time under tension should be at least 2 minutes.
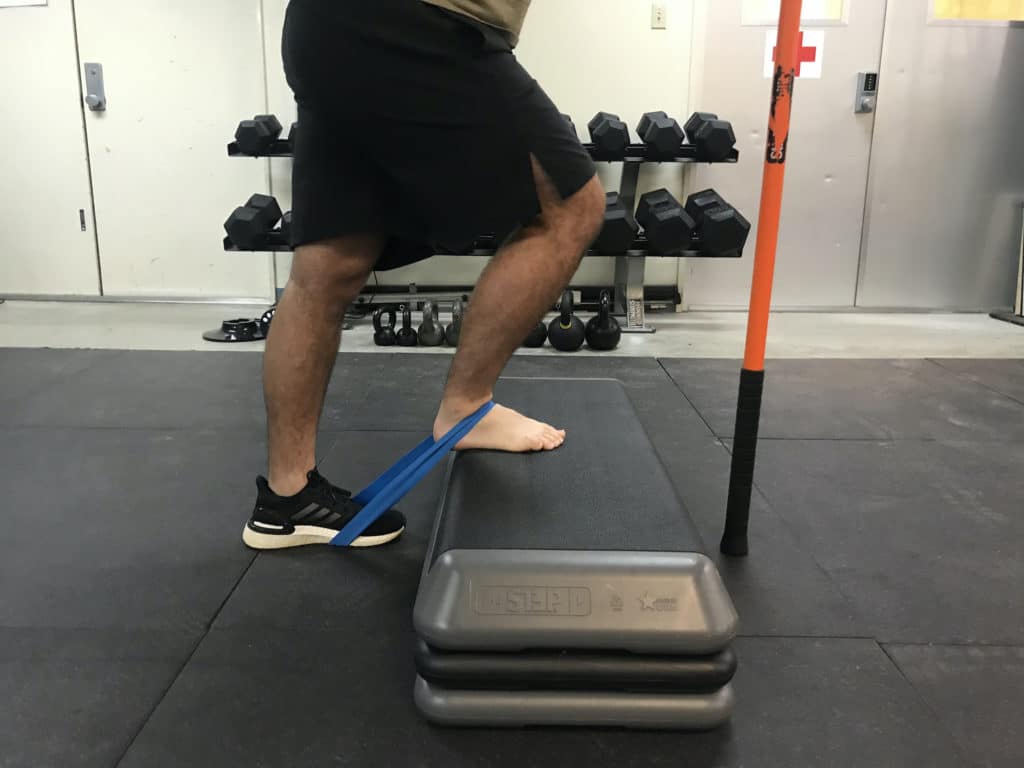
The starting position for the banded ankle mobility drill. note the height of the step and the placement of the band at the crease of the ankle.
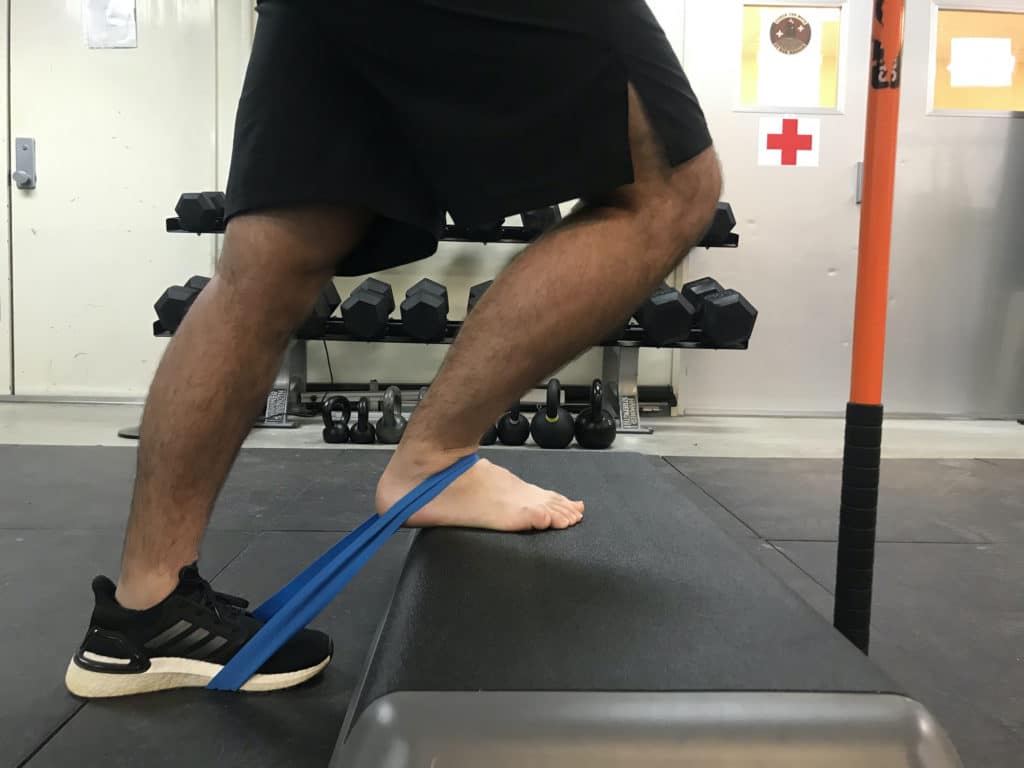
The end position of the banded ankle mobilization. Make sure that your knee tracks directly over your foot and not inward.
If you want more ideas on how to work this drill into a larger program check out our article on designing mobility programs.
Common mistakes
- Band Placement – As I mentioned before the band placement is critical for the banded ankle mobility drill to work. It needs to be below the crease of the ankle, not above. Proper application of the band makes it a joint distraction exercise. You are using the band to pull your talus down and back as your shin glides over the top. As such, you should be actively trying to reduce the weight you are applying to your front foot.
- Too Much Pressure – Because this is a distraction exercise you need to be mindful of how much weight you are applying to the front foot. If you put a lot of weight on the front foot it will compress the joint and therefore reduce the effectiveness of the banded ankle mobilization. Use a PVC pipe or some other implement to help you reduce the amount of pressure you feel on your front foot.
- Box Height – Box height is important. I see people try this drill on flat land but that almost always sets the band up to be too high on the ankle. If you set up the box too high then you may be forced to put too much weight on your foot, compressing the joint and reducing the effectiveness of the drill.
- Too Much Band Tension – The ankle is a fairly robust joint and can withstand quite a bit of force, but that doesn’t mean it should! You should use a small to medium size band and you really don’t need it to be super tight. Too much tension will make the muscles in the area tense up to protect the joint.
Summary
Ankle mobility is a key factor in athletic movements and in daily life.
Ankle mobility deficits are commonly caused by tight ligaments and the banded ankle mobilization is a great way to address ligamentous restriction.
If you suffer from ankle impingement this drill is a great start to treating it.
Even though the ankle is incredibly important it isn’t the only area of the body that needs attention.
That’s why we created Daily Tonic: Movement For Life, our 60-day mobility program.
You can sign up for a free trial on the form below or learn more about it here.

